Marketing
The Marketing section in the admin dashboard groups tools for driving sales: Promotions, Email Campaigns, and Gift Cards.
Gift Cards
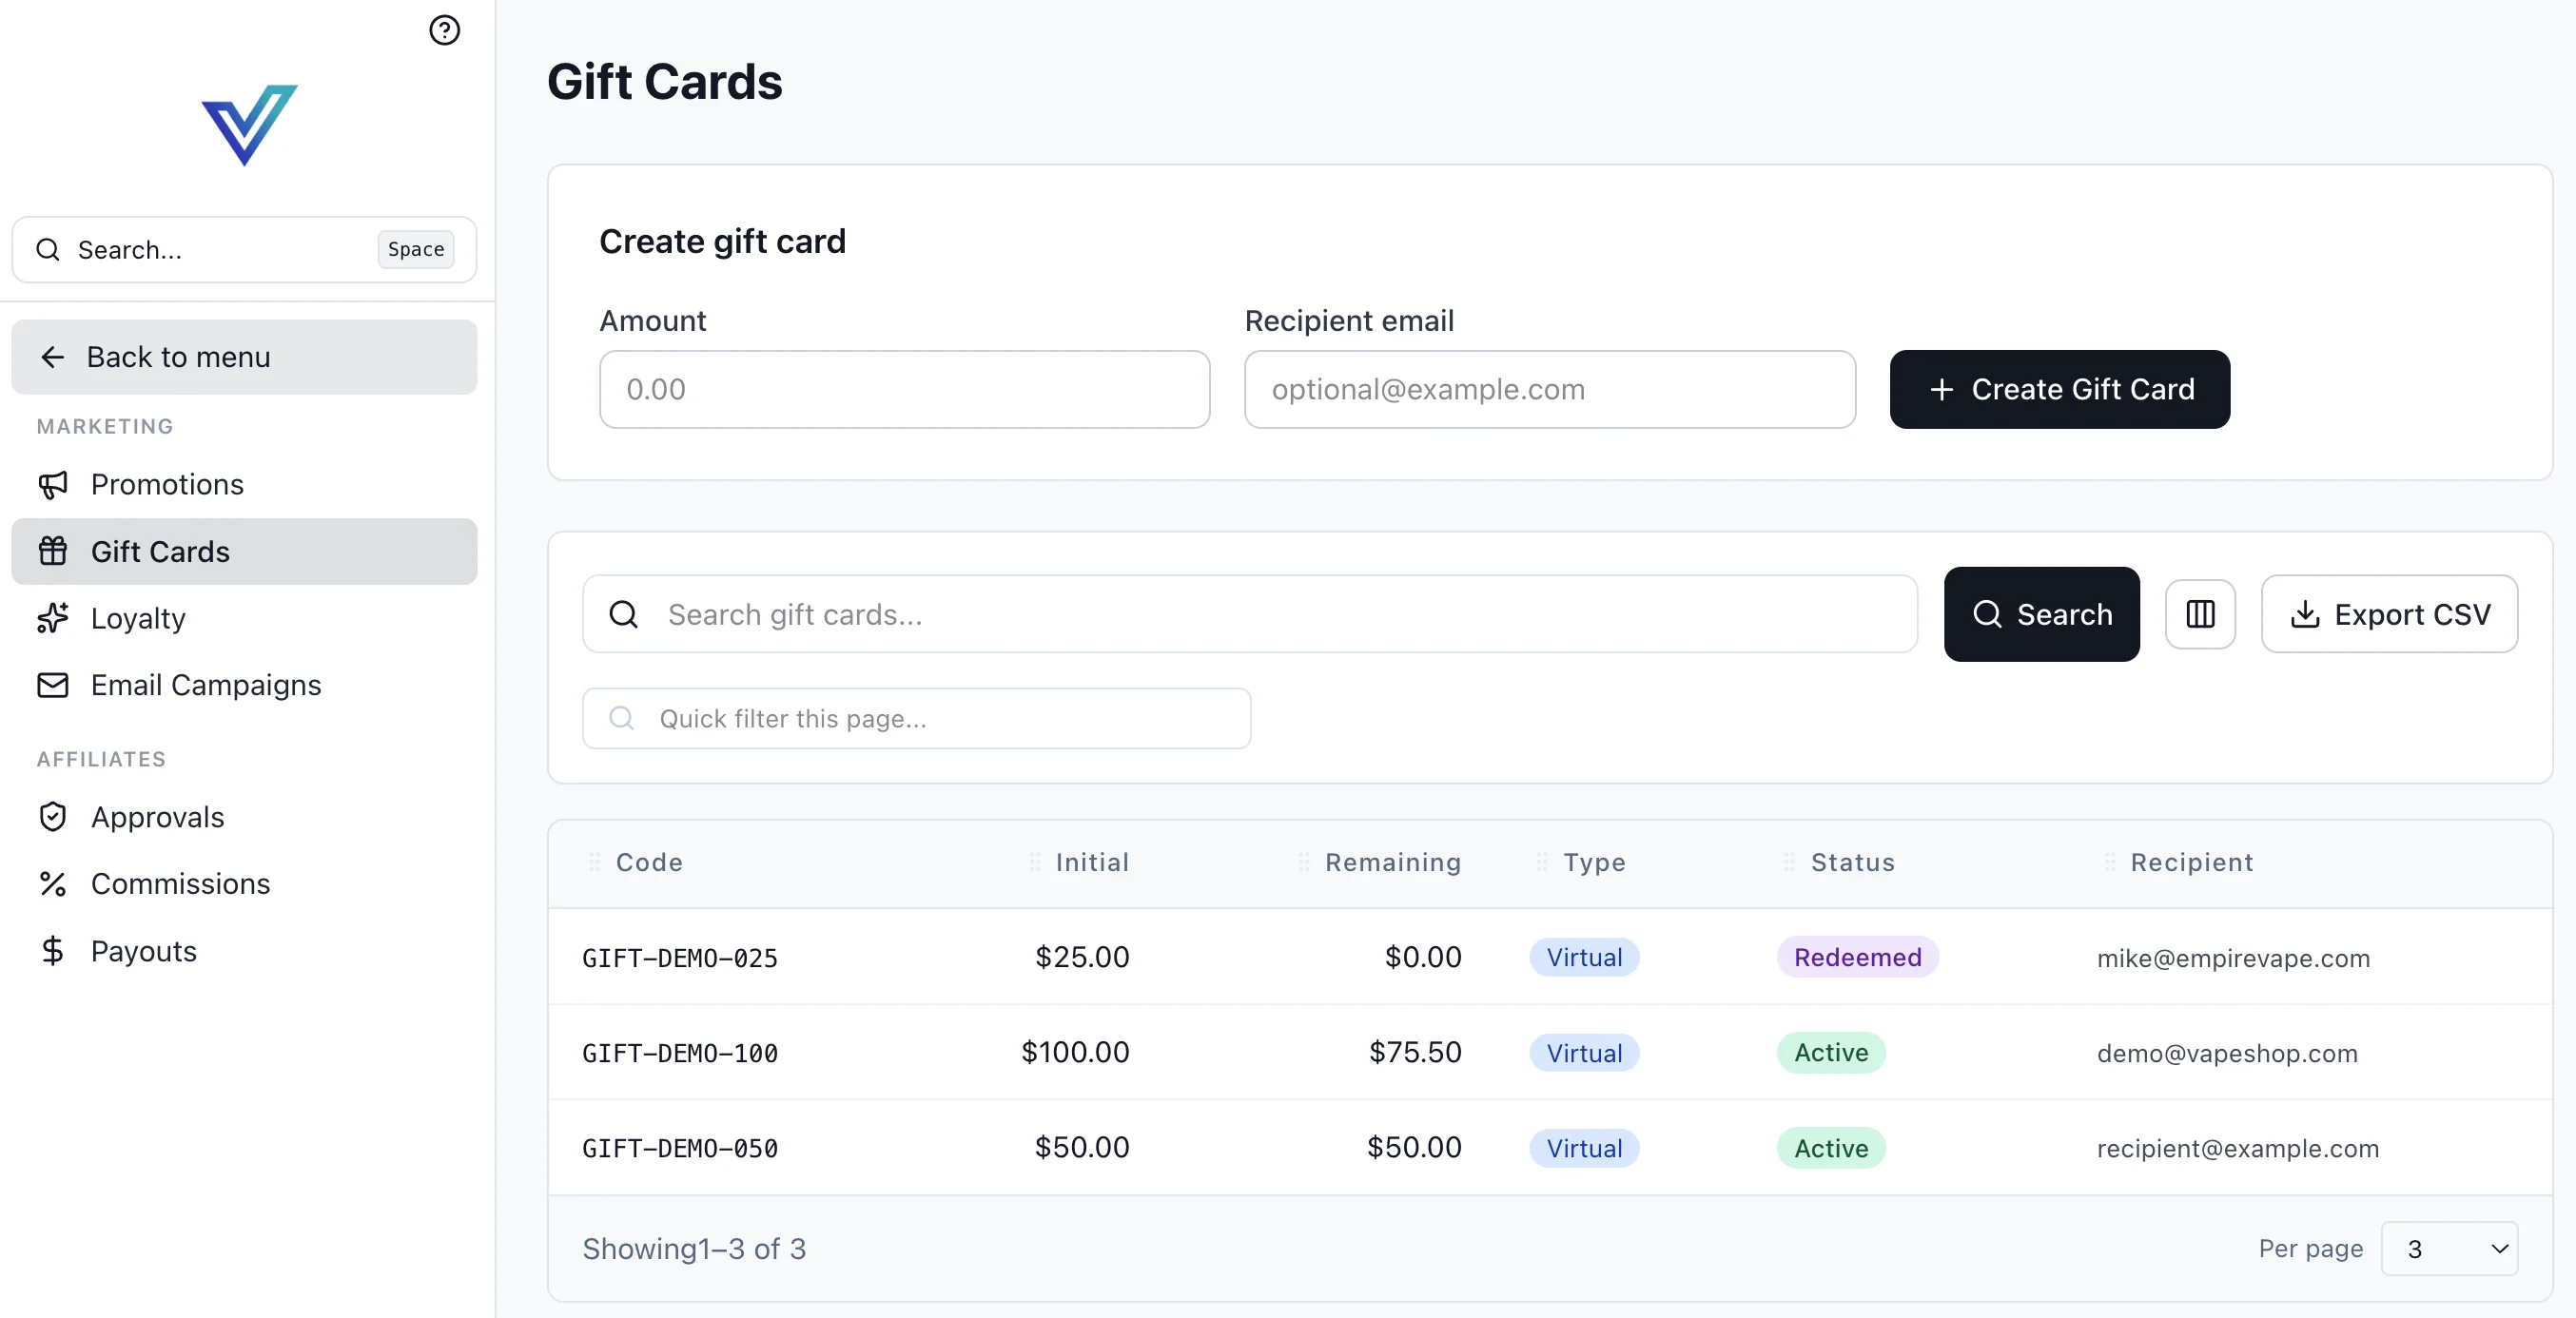
Issue, redeem, and track virtual and physical gift cards from Marketing → Gift Cards:
Creating a card
The Create gift card panel at the top of the page issues a card in one step:
- Enter an
Amountin the channel's base currency. - Optionally enter a
Recipient email. If provided, a delivery email is sent with the code; if omitted, the card is created "unassigned" and can be distributed later. - Click Create Gift Card — a unique code is generated and shown in the list below.
Card fields
| Field | Meaning |
|---|---|
Code | Unique redemption code (e.g., GIFT-DEMO-050) |
Initial | Face value at issuance |
Remaining | Unspent balance — decrements as the card is used |
Type | Virtual (code-only) or Physical (shipped card) |
Status | Active, Redeemed (balance = 0), Expired, or Voided |
Recipient | Email the card was issued to, if any |
Redemption
Customers apply a gift card code at checkout. The code reduces the order total by up to the remaining balance; any leftover stays on the card for future orders. Partial redemptions decrement Remaining and write a GiftCardRedemption row linked to the order.
Single-card creation
Gift cards are created one at a time via the GraphQL createGiftCard mutation (and redeemed via redeemGiftCard). There is no bulk gift-card mutation — for campaign issuance, script repeated createGiftCard calls.
Email Campaigns
Create and send marketing emails to customer segments directly from the admin.
Creating a Campaign
- Go to Marketing > Email Campaigns
- Click New Campaign
- Enter a name and subject line
- Edit the campaign to add HTML body content and configure the audience
Audience Targeting
- All Customers — sends to every customer with an email
- Customer Group — target specific customer groups (e.g., VIP, Wholesale)
- Manual List — provide specific email addresses
Sending
- Click the Send button on a draft campaign to send immediately
- Set a Schedule date/time to send later (uses Temporal workflows)
- Cancel a scheduled campaign before it sends
Extension Tabs
Extensions like Omnisend appear as additional tabs on the Email Campaigns page, providing richer campaign management, automation, and analytics.
Banners
Manage promotional banners under Content > Banners.
Placement Options
- Manual — generates an HTML embed code you can paste in email templates or external sites
- Brand Page — automatically shows at the top of a brand's product listing
- Category Page — automatically shows at the top of a category listing
- CMS Block — add as a block in the page builder
Scheduling
Set start and end dates to run time-limited promotions. Banners outside their schedule window don't display.
Tracking
All banner impressions and clicks are tracked automatically. View analytics under Analytics > Banner Tracking.
Sliders
Create image carousels under Content > Sliders.
Managing Slides
- Create a slider with name and display settings
- Click into the slider to manage slides
- Add slides with images, optional text overlays, and destination links
- Reorder slides using the up/down arrows
Slider Settings
- Auto Play — slides advance automatically
- Interval — time between slides (in milliseconds)
- Transition — slide (horizontal) or fade effect
- Arrows / Dots — navigation control visibility
Tracking
Slide impressions and clicks are tracked. View analytics under Analytics > Slider Tracking.
Analytics
For the full reports catalog — Revenue, Order Status, Top Products, Top Customers, Banner Tracking, Slider Tracking, Promotions, Aging Report, and Affiliates — see the dedicated Analytics & Reports page.
Banner Tracking
View aggregate metrics: impressions, clicks, CTR, unique visitors, cart additions, purchases, and attributed revenue. Click any banner for detailed event logs.
Slider Tracking
Same metrics as banner tracking, grouped by slider with per-slide breakdown in the detail view.
Attribution
When a user clicks a banner or slide and then adds a product to their cart or completes a purchase within the attribution window, that action is attributed to the click. The default window is 60 days (attribution_window_days, configurable per channel). This helps measure the direct revenue impact of your promotional content.